
Using Analytics is an essential part of modern digital marketing. Tag Management is the next step in creating seamless Analytics reporting for your company. Although an intimidating concept at first, Tag Management can help you create organized and well-thought-out event tracking. Before we go further, let’s lay down the basics.
Personally, I think the definition provided by atinternet.com describes tags best: “A tag is an element included on each webpage to be measured. The tag is a small piece of code that is inserted into the page’s source code. It allows the third-party analytics tool to log connections on its server. In digital analytics, the tag is used to refine analyses using segments.”
Tags can be easily implemented using Google Tag Manager, a free Google platform that installs tags on your site. According to Builtwith.com, 39% of the top 10,000 sites use Google Tag Manager for their tag management needs. Tags can be set up using various methods, but Google Tag Manager conveniently provides you with multiple prebuilt configurations of popular tags including the following:
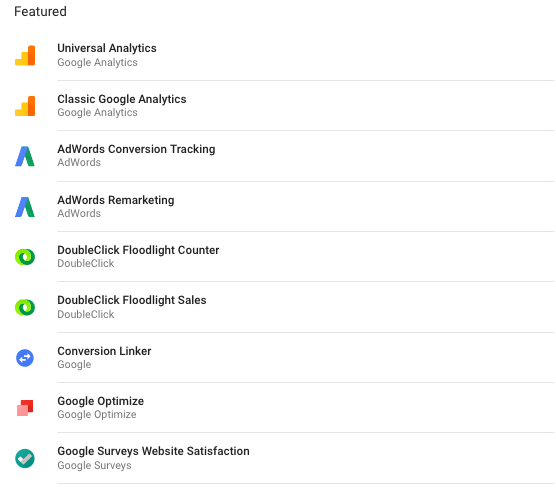
Examples of pre-built tags available in Google Tag Manager.
In addition to prebuilt configurations, you can also create custom HTML tags. These allow you to build any kind of event tracking tag imaginable, including Facebook pixel codes, scroll tracking, and other conversion tags.
It is important to adopt tag management for your site, not only because it simplifies all event tracking but it organizes everything into a seamless one-stop shop. In addition, Google Tag Manager syncs with other reporting programs (including Google Analytics).
How to Create a Google Tag Manager Account and Container
- In Google Tag Manager, click Accounts > Create account.
- Enter an account name and optionally indicate whether you'd like to share data anonymously with Google and others(we usually recommend naming the account after your URL).
- Click Continue.
- Enter a descriptive container name and select the type of content: Web, AMP, Android, or iOS. If setting up a mobile container, select whether you're using the Firebase SDK or one of the legacy SDK’s.
- Click Create.
- Review the Terms of Service and click Yes if you agree to those terms.
When your new container first loads, you will be prompted with the web container installation code snippet, or to get started with Tag Manager as part of the SDK for your chosen mobile platform. You can install your code snippets now, or click OK to clear this dialog. You can always set up your container first and install the container snippet or SDK later.
Installing your Google Tag Manager Container
Note: Container installation varies depending on what website platform your site is built on. Some platforms offer modules or plugins to simplify the installation process. You can always install the container by the instructions below:
1. In Google Tag Manager, click Workspace.
2. Near the top of the window, find your container ID, formatted as "GTM-XXXXXX".
3. Click your container ID to launch the Install Tag Manager box.
4. Copy and paste the code snippets into your website as instructed, or download and install the appropriate mobile SDK. Below are tips for each content type.
- Web
- Place the <script> code snippet in the <head> of your web page's HTML output, preferably as close to the opening <head> tag as possible, but below any dataLayer declarations.
- Place the <noscript> code snippet immediately after the <body> tag in your HTML output.
- AMP
- Place the <script> portion of the JavaScript snippet just above the closing </head> tag.
- Place the <amp-analytics> section immediately after the opening <body> element.
- Mobile
- Implementation of Tag Manager for mobile apps is done in conjunction with the Firebase SDK. Visit the Tag Manager developer documentation to learn how to get started with Android and iOS.
5. Verify or troubleshoot your installation with Tag Manager’s Preview Mode and the Tag Assistant Chrome extension.
Note: One way to test if your Google Tag Manager Container has been installed correctly is by using the Chrome extension Tag Assistant. The extension will show you what tags are present on your site.
How to Add, Update, and Publish Tags
In Tag Manager, click Accounts and select your account.
- Click Tags from the navigation menu.
- To add a tag: Click New. Select the tag type (for example, Google Analytics) and specify triggers for when the tag should fire.
- To edit a tag: Click a tag in the list and make changes on the "Edit Tag" page. For example, you might update the triggers for when the tag should fire.
- To delete a tag: Click a tag in the list. On the "Edit Tag" page, click the menu in the upper right corner of the screen and choose Delete.
- Previewing gives you an opportunity to perform quality assurance (QA) on your site or app and make sure everything looks and behaves as expected. On the web, you can use the debugging option to see which tags fire as you browse and interact with the site.
- From any web page in a workspace with unpublished changes, click the arrow next to "Publish" to expose more options, then click Preview (learn more about previewing and debugging)
- For mobile apps, read the developer documentation for Android and iOS.
- When you're ready, click Publish in the upper-right corner of the screen to begin publishing your changes. Enter a Version Name and Version description to describe what was changed, then click Publish.
Best Practices When Setting up Tags
- Always set up any Google account with a general company email instead of a personal email, in case of termination.
- Always preview a tag to make sure it’s firing correctly on your website.
- Always setup Google Analytics using Google Tag Manager.
- Develop naming conventions in Google Tag Manager to keep your account organized.